
How to Fix ANY Photo with a SKEWED Perspective or Crooked Lines (VIDE0)
Today’s Photoshop tutorial addresses a very common problem that many of us encounter when shooting landscapes, environmental portraits, and other photographs outdoors. It occurs when your camera is pointed up or down, rather than flat to the horizon.
In such circumstances you’ll notice a weird perspective in your photos with converging vertical lines, be they tilted trees or crooked buildings in cityscape images and portraits with structures in the background. In this Photoshop tutorial from the popular PHLEARN YouTube channel you’ll learn how to easily fix these problems and other frustrating perspective issues.
Instructor Aaron Nace is an image-editing expert with a variety of helpful post-processing lessons on his channel. Today he demonstrates how to straighten vertical lines, merge layers seamlessly, and use Photoshop’s powerful Transform and Perspective Warp tools. You’ll also discover how Photoshop’s Generative Fill tool can automatically correct backgrounds and remove distortion.
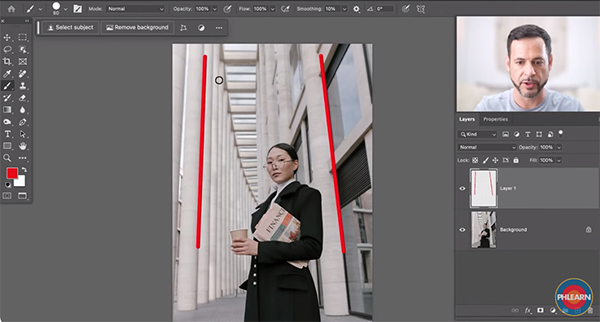
When it comes to portrait photos the trick involves cutting out the subject, fixing the skewed lines, and then placing the subject back in the corrected image. In the case of his first example the buildings in the background converge toward the top of the frame because the camera was pointed upward while Nace shot the portrait. This fix starts by clicking on the Select tab atop the screen, and then choosing Subject from the dropdown menu that appears.
You don’t want to use the Warp tool for this task because it can make faces and bodies look really strange. Instead Nace duplicates the Background layer and drags it to the New Layer icon at the bottom of the screen. He then explains what to do so the subject appears on a plain white layer.
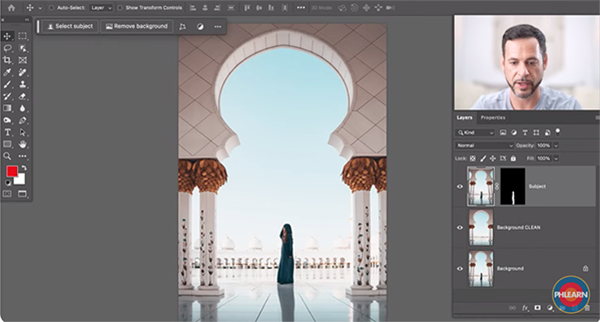
Now Nace creates a new version of the background that doesn’t include his model. He then explains how to use Generative Fill to quickly straighten the buildings. From there it’s a simple matter to add his subject back into the scene.
The foregoing is just one of the tools and techniques you’ll learn how to use in less than 20 minutes. By the time you’re done watching, photos with a distorted perspective will be a thing of the past. You can find more great editing methods like these by paying a visit to the PHLEARN instructional YouTube channel.
We also encourage you to watch another tutorial we posted recently that demonstrates how to use both positive and negative Clarity to edit landscape photos for maximum impact.


