
Photoshop Basics: HDR Editing for Landscape Photos Made Easy (VIDEO)
A common problem when shooting outdoor scenes full of bright highlights and deep shadows is arriving at a proper exposure. The quick tutorial below from the PHLOG Photography instructional YouTube channel explains a Photoshop HDR editing technique that’s easy enough for users of all skill levels.
Instructor Christian Mohrle is a German pro, specializing in landscape photography, who regularly posts Photoshop and Lightroom tutorials for turning good images into great ones. In this episode he uses a panorama shot to explain his HDR tips, but his advice works wonders for balancing the tones in any outdoor photos you shoot.
Mohrle’s goal for this image with very dark foreground is to create a bright, dreamy, Golden Hour effect while retaining a subtle look. If you’ve watched his videos in the past you know this strategy is different from his usual approach of accentuating vibrance and saturation in a more significant way.
Mohrle always begins his edits with several global adjustments to create a solid base image for the masking and color grading steps that follow. He first changes the profile to Adobe Landscape which immediately boosts saturation and brightens the darkest parts of the shot. He then increases exposure to further lighten the image, while dropping the highlights to avoid an overexposed sky.
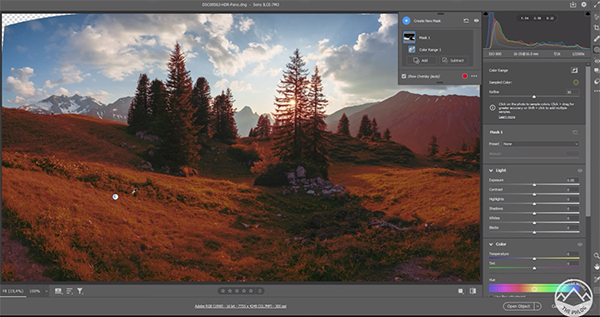
The image now looks much better, and it’s now time for masking. Mohrle uses a Color Range mask to adjust green highlights in the foreground without affect the sky and mountains in the background. The then applies another Color Range mask to target blues in the sky and add a bit of contrast.
After adding a linear Gradient to introduce more details in the foreground, the next step is color grading the shot to match his vision. He first increases yellow saturation in the HSL panel. The next steps are bumping up green Luminance to brighten the foreground and dropping blue Luminance to darken the sky.

Mohrle finishes the color grading with split-toning, using warm saturated colors on the highlights. He begins the final steps in the transformation with Photoshop’s Lasso tool and Content Aware Fill to eliminate gaps toward the corner of the image that resulted from the panorama merging process.
Mohrle lastly adds a subtle glow effect to the top of the photo using Gaussian Blur and a simple lighten blending mode. Compare his before/after images and you’ll be very impressed.
There’s much more to learn on Mohrle’s YouTube channel, and in the tutorial we posted earlier, explaining another pro’s composition trick for more compelling landscape photographs.


