IKEA has just launched a massive 96 new products – but these are the only pieces you need to pay attention to
The classic STOCKHOLM collection just got even better

A firm understanding of Dynamic Range is super important for achieving optimum results, yet this key element is often ignored. In fact, this crucial concept is one key to capturing well-balanced, high-quality images that make you proud.
Today’s quick explainer comes to us from the Great Big Photography YouTube channel, a popular network of experienced creatives who share a wide range of courses catering to both amateurs and professional shooters. This three-minute episode explains Dynamic Range in simple terms and demonstrates why is particularly important if you’re struggling with overexposed highlights or crushed shadows that are virtually devoid of detail.
Our unnamed instructor begins with this definition: “Dynamic Range is the ratio between the maximum and minimum light intensities that your camera can record in a single frame,” and it’s a value that can differ significantly from one model to another.

Consider this interesting fact: “The scope of tones that your camera can record is far more limited than what our eyes can see” (although the disparity has narrowed somewhat as sensor technology has evolved). This is one reason why what you see in the field isn’t always what you get.
When shooting contrasty scenes in harsh sunlight, for example, even the best cameras can fail to deliver a sufficient range of tones from bright highlights to deep shadows. And this dilemma often holds true when photographing in low light.
In either case, there are techniques for dealing with these issues to achieve properly balanced exposures. You’ll learn how file format (i.e. Raw or Jpeg) affects dynamic range, and why our instructor recommends shooting in Raw for maximum post-processing flexibility. He also describes how the metering mode you select factors into the equation—specifically with regard to Spot vs. Evaluative metering.

Another topic of discussion involves using a technique known as “HDR photography” to blend multiple exposures into one perfect shot, and another method used in bright conditions when the trick is exposing for the highlights.
You’ll also see why our instructor recommends shooting in diffused light whenever possible to capture a naturally balanced tonal range. The Great Big Photography YouTube channel has thousands of subscribers and many more how-to lessons like this one.
And don’t miss the explainer we featured recently with another accomplished pro who demonstrates why Photoshop’s new Hue/Saturation tool is a game-changing upgrade for creating photographs with perfect colors.
Do you understand the benefits of shooting in Manual mode, but you’re still struggling to achieve the right combination of settings when photography birds? If so, this tutorial from the Flying Parrot Photography YouTube channel will quickly simplify the process.
Today’s instructor Sonia is a “nature-obsessed” Australian pro whose how-to videos are designed to help you find art in nature, take bird photography to the next level, and approach all conditions with confidence. She summarizes today’s nine-minute episode like this: “I’ll walk you through how I choose the best manual settings for bird photography so you can stop guessing and start capturing well-exposed shots.”
The tips in this nine-minute video fly by in a hurry so you may want to prepare to jot down a few notes before clicking the “Play” button. Sonia covers her entire process from arriving in the field to understanding how to handle ever-changing light and avoid missed shots while fumbling around with your settings.

The bottom line is this: Whether the subject is stationary, you’re chasing small fast-moving birds, or photographing large raptors, you’ll know exactly how to configure the camera for success. There’s also a link in the description beneath the video for downloading Sonia’s free guides and other helpful assets.
Sonia also explains why this genre of nature photography poses unique changes, and she demonstrates straightforward solutions for getting the job done to perfection with whatever camera you own. She prefers shooting in early morning when many birds are most active and recommends setting your lens to maximum aperture.
Step number two is dialing in a setting of ISO 2,500 and taking a look at the shutter speed that this gives you. Sonia is aiming for a speed of 1/1,600 to 1/2,000 so her preliminary ISO setting may need to be modified accordingly depending upon available light. As she explains, “If the day is particularly dull I may have to boost my ISO up to 4,000 or even 5,000 to get a fast enough shutter speed.”

Sonia takes a deeper dive into the foregoing and several other important settings and considerations, and you’ll pick up some enlightening tips on camera angles, lens choice, and composing bird photographs for maximum impact.
Her popular YouTube channel includes many more instructional videos for photographing our feathered friends, so be sure to check it out.
We also recommend watching the video we shared recently from another accomplished pro who presents a beginners guide to Exposure Bracketing that will enable you to capture outdoor photographs with perfect tones in challenging light.
Want to capture stunning ultra-wide photos with your iPhone? Most folks don’t understand how to how to use the Panorama mode correctly, but this quick tutorial from the iPhone Photography School explains everything necessary to get the job done with ease.
Today’s instructor Emil Pakarklis is founder of the channel and promises that by following his straightforward tips “your shots will look bigger, better, and more immersive than ever.” And like with Emil’s other tutorials you’ll learn why you don’t need an expensive mirrorless camera or DSLR to capture jaw-dropping images.
Emil is on location atop a cliff in a beautiful national park looking down on a giant u-shaped riverbend—a perfect vantage point for shooting a breathtaking panorama with a unique perspective. The first step is opening the iPhone camera app that by default is set to a 1X wide-angle view that prevents him from capturing the entire scene in one shot.
Switching to the .5X ultra-wide setting almost solves the problem by encompassing the beautiful sky along with an interesting foreground element. It’s a really nice image but Emil laments, “it still doesn’t convey everything in the expansive scene.” And this is when the easy-to-use Panorama mode saves the day.
You’ll see why this technique requires that you rotate the camera to a vertical orientation before proceeding. Then Emil swipes his finder from right to left twice to bring up the Panorama mode. There’s another key consideration to understand; namely, determining which of the phone’s lenses will deliver optimum results.
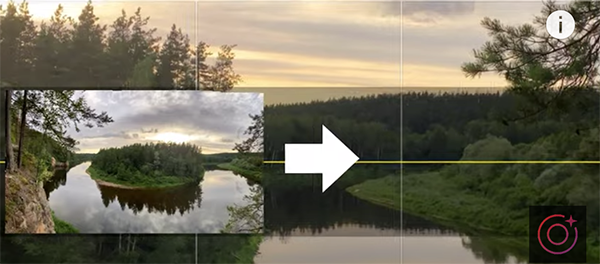
Emil makes this determination by “pre-visualizing the scene while moving the phone from left to right.” He also explains how to decide whether you should start shooting from the left or the right. As you’ll see, there’s a white arrow on the screen for making the choice.

Emil’s says, “I like to start where there’s more interest or the where the scene is brighter” which is why he begins shooting from the left for this particular image. Then he presses the shutter button and moves slowly and gently from left to right, explaining that “the slower I move, the better it’s going to work.”
You’re goal throughout the capture is to keep the white arrow atop the yellow horizonal line on the screen. Another rule, according to Emil, is to capture your panorama image more than once. That’s because the iPhone is stitching a lot of individual photos together and occasionally there may a mistake with one attempt surpassing another.
Emil walks you through a few other important techniques that are super simple to master, and we recommend having your iPhone handy as this helpful lesson proceeds. Then head over to the iPhone Photography YouTube channel many more mobile photography tips and techniques.


