Maestro PMS, the hotel industry’s leading Web Browser based cloud and on-premises all-in-one property-management system, will showcase the latest enhancements to its industry-defining technology at the upcoming HITEC 2024 event in Charlotte, N.C. Updated mobile functionality, enhancements to payment processing tools, and more will be on display at Booth 1844 at the Charlotte Convention Center from June 24-27.
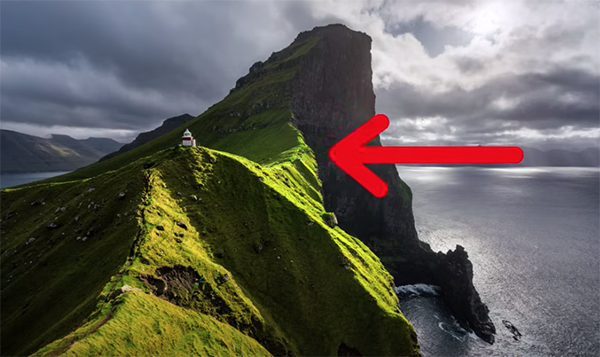
Choosing the proper aperture setting is a fundamental aspect of all genres of photography, especially when shooting landscapes with both near and far elements in the scene. The f/stop in use has a major impact on depth of field, which is why many outdoor photographers prefer leaving their Mode dial set to Aperture Priority.
Today’s comprehensive tutorial breaks down and explains what aperture is all about and reveals which f/stop settings are best for different situations. You’ll also learn why the sharpness of an image depends upon aperture, and the various effects you can create with different settings.
Instructor Mads Peter Iversen is a Danish pro who regularly shares shooting and editing tutorials with eye-opening secrets to the stunning images in his portfolio. This episode is a behind-the-scenes video where you’ll watch Iversen to his thing, and along the way he discusses everything you need to know about aperture and how it enables you to capture different images of the same scene with a totally different look.
This lesson runs almost 19 minutes and covers a lot of ground, so we suggest taking a few notes for future reference. As you’ll see, Iversen has some great advice for doing things right, as well as several warnings about common mistakes.
Aperture is one of the three components in the familiar Exposure Triangle and that’s where Iversen begins. You’ll see how the f/stop in use interacts with the other two variable (shutter speed and ISO) to arrive and a correct exposure with exactly the look you want. He also discusses the critical concept of depth of field and how aperture factors into the equation.
Proper focus is another key consideration, and in some cases the goal is to have maximum sharpness throughout a landscape scene. Since the smaller the aperture the greater the zone of sharpness you may wonder why it’s a mistake to always shoot at f/22 when light levels permit.
This is Iversen’s answer: “It comes down to an optical phenomenon called diffraction which explains why the more you stop down the aperture the more light is scattered through the smaller and smaller hole.” In essence, this results in softer images with compromised optical quality.
Other topics of interest include the relationship between aperture and vignetting, along with a variety of optical mistakes to avoid. You’ll also learn what to do when f/22 is absolutely necessary, an editing solution known as focus stacking, and the impact of aperture on creative effects like sun stars and others.