
Use the Power of Tonal Adjustments for Vibrant Contrast-Rich Landscape Photos (VIDEO)
This 10-minute Lightroom lesson from the PHLOG Photography YouTube channel explains the importance of proper tonal adjustments when editing landscape photographs that appear boring and dull—an uninspiring look you want to avoid at all costs.
Instructor Christian Mohrle is a popular German educator and experienced outdoor photographer whose tutorials we feature often. The topic of the day is to illustrate “how I apply tonal adjustments to add punch to my landscape photos.” This effective technique is simple enough for anyone to master in minutes.
This process is super-easy to learn if you download Mohrle’s sample image using the link beneath the video so you can follow along in real time. As you’ll see, one of the problems with the shot is that it’s lacking in contrast. Be sure to keep your eye on the histogram as Mohrle makes all the necessary adjustments.

The first step is modifying White Balance with Lightroom’s Tint and Color Temperature sliders. A quick glance at the histogram reveals an excess of blue tones, and the initial goal is to achieve what Mohrle refers to as a “neutral image.” He then changes the Lightroom Profile from Adobe Color to Adobe Standard which provides more control over Contrast.
Now we’re ready for the specific tonal adjustments that Mohrle recommends. Because this is a snow-covered winter scene, the first goal is to significantly brighten up the shot. Interestingly Mohrle drops the exposure because he wants a darker base image for the enhancements that follow.
Mohrle then demonstrates how to add Contrast by “spreading the histogram” with a few quick changes to Exposure and Highlights. Next he explains how to adjust Shadows and Blacks to further accentuate the effect. He notes that it’s important to take a subtle approach, “otherwise the image looks very, very strange—very, very fast.”
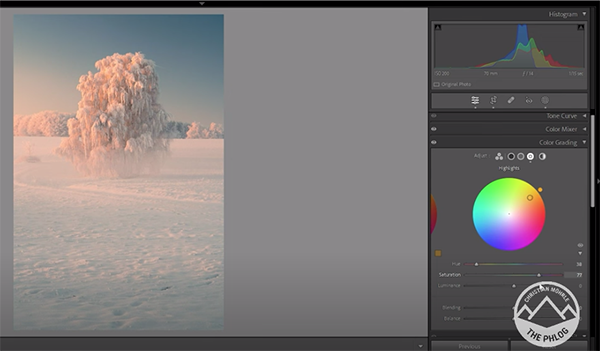
Pumping up Texture adds more detail, while dropping Clarity and Dehaze achieves the soft, dreamy, foggy effect that Mohrle wants. He also increases Vibrance and Saturation. Keep in mind that all of the aforementioned adjustments were applied to the entire image at once.
Now it’s time for selective adjustments using masks to individually target specific areas with the frame, and this is where most notable enhancements occur. Mohrle then completes the job with straightforward color grading and sharpening. Check out the big difference achieved in his final result. After the video ends head over to Mohrle’s instructional YouTube channel for more editing tips and tricks.
We also recommend watching a tutorial we posted recently from another image-editing expert who explains how to use Lightroom to banish unrealistic color casts that can ruin an otherwise great photograph,


